
Can I paint kitchen cabinets myself? Yes, you absolutely can paint kitchen cabinets yourself! Painting your kitchen cabinets is a fantastic way to change your kitchen’s look without the huge cost of replacement. This cabinet painting tutorial walks you through every step to get a professional, lasting job done right at home. We will show you how to achieve a durable finish for kitchen cabinets that stands up to daily use.
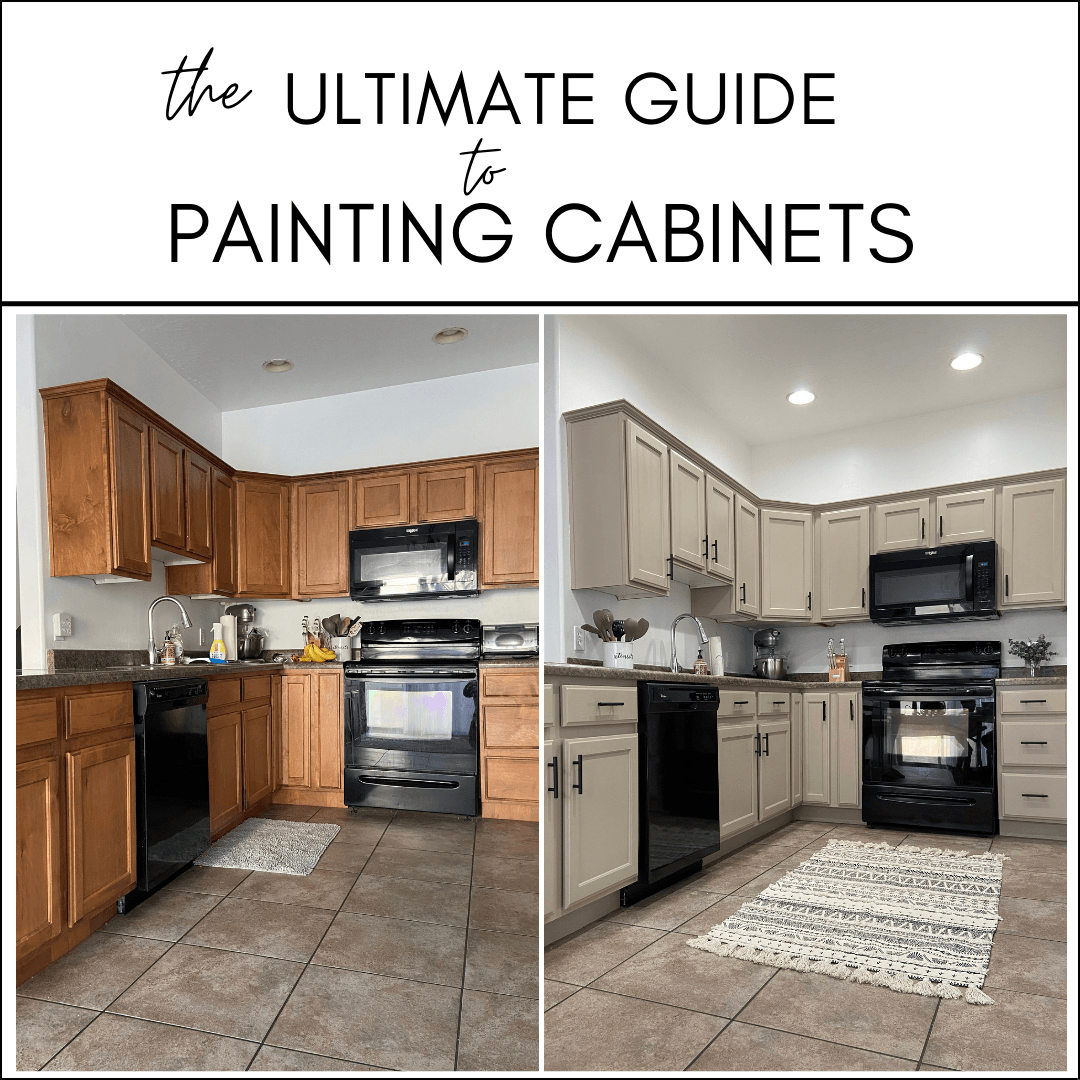
Image Source: www.bbfrosch.com
Gathering Your Cabinet Painting Supplies Checklist
Before you start, you need the right tools. Having everything ready saves time later. This list covers the essentials for a top-notch job.
| Category | Item | Purpose |
|---|---|---|
| Preparation | TSP substitute or degreaser | To clean grease off cabinets. |
| Fine-grit sandpaper (180-220 grit) | To scuff the surface. | |
| Medium-grit sandpaper (120-150 grit) | For repairs or very glossy surfaces. | |
| Tack cloths or microfiber cloths | To remove all dust. | |
| Painter’s tape (high quality) | To protect areas you don’t want painted. | |
| Plastic sheeting or drop cloths | To protect floors and countertops. | |
| Repairs & Priming | Wood filler or Bondo | To fix holes and deep scratches. |
| High-quality bonding primer | Essential for paint adhesion. | |
| Painting | Best paint for kitchen cabinets (see below) | The top coat for the finish. |
| High-density foam rollers or brushes | For smooth paint application. | |
| Paint tray | To hold your paint. | |
| Optional Equipment | Paint sprayer | For the smoothest possible finish. |
Step 1: Prepping Cabinets for Paint – The Key to Success
Poor prep leads to peeling paint. This is the most important part of refinishing old kitchen cabinets. Do not rush this phase.
Cleaning the Surface Thoroughly
Kitchen cabinets collect grease, oil, and grime. Paint will not stick to grease.
- Remove hardware: Take off all knobs, pulls, and hinges. Put them in a labeled bag.
- Remove doors and drawers: Take the doors off the frames. Work on a flat, clean surface. Label where each door belongs (e.g., “Under Sink Left”).
- Wash: Use a strong degreaser. A TSP substitute works well. Mix it according to the directions. Wipe every surface—front, back, and edges—with a sponge or rag. Rinse well with clean water. Let the cabinets dry fully. They must be totally dry before sanding.
Sanding for Adhesion
Sanding creates a “tooth.” This rough surface helps the primer grab hold.
- Use 180 or 220-grit sandpaper. This is fine enough not to leave deep scratches. If you have very glossy, slick cabinets (like older laminate), you might start with 150-grit, but finish with 220-grit.
- Lightly sand every surface you plan to paint. You are not trying to remove all the old finish. You just need to dull the shine completely.
- Wipe away all sanding dust using a vacuum first, then a tack cloth. Dust left behind causes bumps in your final coat.
Repairing Imperfections
Now is the time to fix damage.
- Fill any deep dents or holes with wood filler. Let it dry completely.
- Sand the repaired areas smooth using 220-grit paper. Make sure they blend perfectly with the cabinet surface.
- Wipe down again with a tack cloth.
Taping and Protecting Areas
Use high-quality painter’s tape. Cheap tape leaves sticky residue.
- Tape off any areas you do not want paint on, like the inside of the cabinet boxes (if you are only painting the outside).
- Lay down your drop cloths to cover floors and counters completely.
Step 2: Priming for a Durable Finish for Kitchen Cabinets
Primer seals the old surface. It blocks stains and helps the topcoat stick strong. Using the right primer is vital for success, especially when painting laminate kitchen cabinets.
Choosing the Right Primer
What is the best paint for kitchen cabinets? This depends on the primer. For maximum durability, you need a bonding primer.
- For wood/MDF: A quality oil-based or shellac-based primer is often best. They seal wood tannins well.
- For laminate or slick surfaces: You need a specialized bonding primer (often an acrylic-alkyd hybrid). These are designed to stick to plastics and glossy surfaces. Do not skip this step when painting laminate kitchen cabinets.
Applying the Primer
Apply primer thinly and evenly.
- Use a brush or foam roller for the primer coat on frames.
- If using a sprayer, follow the manufacturer’s instructions for primer thinning.
- Apply one coat. Let it dry fully as directed on the can.
- Lightly sand the primed surface with 220-grit sandpaper (very light touch). This removes dust nibs settled in the primer.
- Wipe clean with a tack cloth. Apply a second coat of primer if the old color bleeds through or if the surface is still patchy.
Step 3: Selecting the Best Paint for Kitchen Cabinets
The paint choice is what gives you that long-lasting, smooth look. Standard wall paint will fail quickly in a kitchen environment.
Top Paint Options for Cabinets
| Paint Type | Pros | Cons | Best Use |
|---|---|---|---|
| Waterborne Alkyd (Acrylic Alkyd) | Very durable, good leveling, low odor, easy cleanup. | Can be more expensive; drying time is crucial. | Highly recommended for most DIYers. |
| 100% Acrylic Enamel | Durable, easy to apply, low VOC. | Might require a high-quality bonding primer. | Good option if you prefer water-based. |
| Cabinet-Specific Paint | Formulated for high wear, often self-levels well. | Can be pricey; limited color choices sometimes. | Excellent professional results. |
Why not standard latex? Standard latex paint is too soft. It scratches and chips easily when faced with humidity, heat, and constant touching in a kitchen. You need a hard enamel finish.
Step 4: Painting Techniques – Brush, Roll, or Spray?
How you apply the paint drastically affects the final look. Many people aim for a sprayed look, even if they do not own a sprayer.
Option A: Brushing and Rolling
This is the most common DIY method. The goal is to minimize brush strokes.
- Thin coats are key: Do not try to get full coverage in one thick coat. Thin coats dry faster and level out better.
- Use high-quality tools: Use a high-density foam roller or a high-quality angled sash brush designed for smooth finishes.
- Roll first, finish with a brush: On flat panels, use the foam roller to apply the paint quickly. Go over the wet paint immediately with a lightly loaded, high-quality brush using long, smooth strokes. This “tipping off” smooths the texture left by the roller.
- Work quickly: Keep a “wet edge.” Do not go back over paint that has started to set up.
Option B: How to Use a Paint Sprayer on Cabinets
Spraying gives the closest thing to a factory finish. It requires more setup and practice.
- Thinning is Mandatory: Follow the specific thinning ratios for your chosen paint and sprayer model. Usually, you thin enamel paints with a small amount of water or the manufacturer’s recommended thinner.
- Ventilation and Protection: You must have excellent ventilation and wear a respirator rated for paint fumes. Overspray is significant; mask off everything thoroughly.
- Practice: Practice on scrap pieces of wood first. Learn the proper distance (usually 6–10 inches) and speed of your sweep.
- Overlap: Overlap each pass slightly (about 50%). Keep the gun moving constantly while pulling the trigger. Stop the trigger at the end of your pass, not mid-sweep.
Step 5: Curing and Reassembly
The drying time listed on the paint can is usually for the paint to be dry to the touch. The curing time is what matters for durability.
- Dry Time vs. Cure Time: Paint may be dry in 4 hours, but it might take 7 to 30 days to fully harden (cure) to its maximum durability.
- Be Gentle: During the first week after painting, treat your cabinets very gently. Avoid slamming doors or wiping vigorously with harsh cleaners. This is vital for a durable finish for kitchen cabinets.
Reassembly
Only reassemble the cabinets after the final topcoat is fully cured or at least 48–72 hours after the final coat, depending on the paint used. Colder or humid weather significantly extends curing time.
- Install hardware.
- Rehang doors and drawers.
Special Considerations for Different Surfaces
While the core steps remain the same, certain materials need extra attention in your DIY cabinet painting guide.
Painting Laminate Kitchen Cabinets
Laminate surfaces are extremely slick. If you do not prepare them perfectly, the paint will peel off in sheets.
- Abrasive Sanding: You must rough up the surface more aggressively than wood. Use 120-grit sandpaper first to create a true physical bond, then finish with 220-grit. Clean extremely well afterward.
- Mandatory Bonding Primer: Do not use standard primers. Use a specific bonding primer (often a heavy-duty acrylic/alkyd blend) formulated for slick plastics or factory finishes.
- High-Adhesion Topcoat: Use a high-quality waterborne alkyd or a specific cabinet enamel paint designed for adhesion.
Refinishing Old Kitchen Cabinets (Stained Wood)
If the cabinets have a thick, dark stain or old varnish, you must ensure the primer blocks it.
- If the old finish is flaking or chipping, you must scrape and sand off those areas until you hit solid material.
- Use a shellac-based primer. Shellac is excellent at blocking stains (like tannins bleeding from wood or water stains) from coming through the new paint.
Common Cabinet Painting Mistakes to Avoid
Knowing what not to do can save hours of rework. Avoiding these pitfalls is key to a successful cabinet painting tutorial.
- Skipping the Cleaning Step: Trying to paint over grease is the fastest way to guaranteed failure. Clean, clean, clean!
- Using the Wrong Primer: Using a standard primer on laminate or high-gloss surfaces guarantees peeling. Always use a bonding primer where needed.
- Applying Paint Too Thickly: Thick coats sag, drip, and take forever to dry. Thin coats dry fast, level out nicely, and build up to a strong finish over multiple applications.
- Painting in High Humidity: High humidity slows drying and curing. It also makes paint prone to texture issues. Paint when humidity is moderate, ideally between 40% and 60%.
- Not Letting Paint Cure: Being impatient and using the cabinets hard before the paint has hardened is a huge mistake. The finish won’t reach its intended durability.
Achieving That Smooth, Professional Look
The difference between a DIY job and a pro job often comes down to surface quality before the paint goes on and the application method.
Brush and Roller Technique Refinement
If you are rolling and brushing, follow this process for doors laid flat:
- Apply paint to the center of the door panel using the roller. Spread it out evenly.
- Use the brush (the “tipping off” tool) to smooth the paint. Start at one edge and drag the brush lightly across the wet paint in long, overlapping strokes. Do not press hard. The weight of the brush should do the work.
- Edges and Corners: Use the brush only on the edges and in the corners where the roller cannot reach. Apply paint thinly to these areas to prevent buildup, which causes drips.
Spraying Best Practices
If you decide to use a sprayer, remember these tips for superior results:
- Air Quality: Ensure your air compressor or sprayer unit is supplying clean, oil-free, dry air. Moisture or oil in the air line will ruin the finish.
- Viscosity Check: Always check the paint’s viscosity (thickness) using a flow cup if recommended by your sprayer manual. Too thick means poor atomization (a “fuzzy” texture). Too thin causes runs.
- Light Passes: Apply paint in multiple light coats rather than one heavy coat. Three light coats are far more durable and attractive than one thick coat.
Maintaining Your Newly Painted Cabinets
Once your cabinets are cured, maintenance keeps them looking new for years.
- Cleaning: Use mild, non-abrasive cleaners. A soft cloth dampened with warm water and a tiny bit of dish soap is often enough.
- Avoid Harsh Chemicals: Strong solvents, bleach, or abrasive scouring pads will strip the top layer of your durable finish for kitchen cabinets.
- Wipe Spills Immediately: Acids from food (like tomato sauce or vinegar) can etch the paint if left sitting for a long time.
Frequently Asked Questions (FAQ)
Q: How long do kitchen cabinets need to cure before I can use the kitchen?
A: While cabinets are dry to the touch in hours, curing takes time. Wait at least 48–72 hours before heavy use. For the full, toughest finish, treat them gently for 7–14 days, especially if using waterborne alkyds.
Q: Do I really need to sand if I use a special bonding primer?
A: Yes. Even the best bonding primer needs some surface profile—a slight “tooth”—to grab onto. Light sanding (scuffing the gloss) is necessary for any successful paint job, especially when painting laminate kitchen cabinets.
Q: Can I paint just the cabinet boxes and leave the doors?
A: You can, but it is strongly discouraged. The two paint jobs will wear differently, look different (one will be shiny, one dull), and clean differently. For a uniform, professional result, paint everything that will be visible—doors, drawer fronts, and the visible interior/exterior of the boxes.
Q: What is the best color for hiding imperfections?
A: Mid-tone or darker colors are generally better at hiding minor surface imperfections (like tiny bubbles or slight sanding inconsistencies) than very bright whites. However, excellent preparation is the true key to hiding flaws.
Q: My cabinets are already painted. Can I paint over the existing paint?
A: Yes, provided the existing paint is sound (not peeling or flaking). If it is in good shape, clean it well, lightly sand it to dull the sheen, and then apply your bonding primer and topcoats. This is standard practice when refinishing old kitchen cabinets.