
Yes, you can sharpen your kitchen knives at home using simple tools. Many people think only pros can get a good edge, but that is not true. This guide will show you the steps. We will cover many knife sharpening techniques so you can keep your blades sharp. A sharp knife is safer and makes cooking fun. Dull knives slip easily. Sharp knives cut food with little effort.
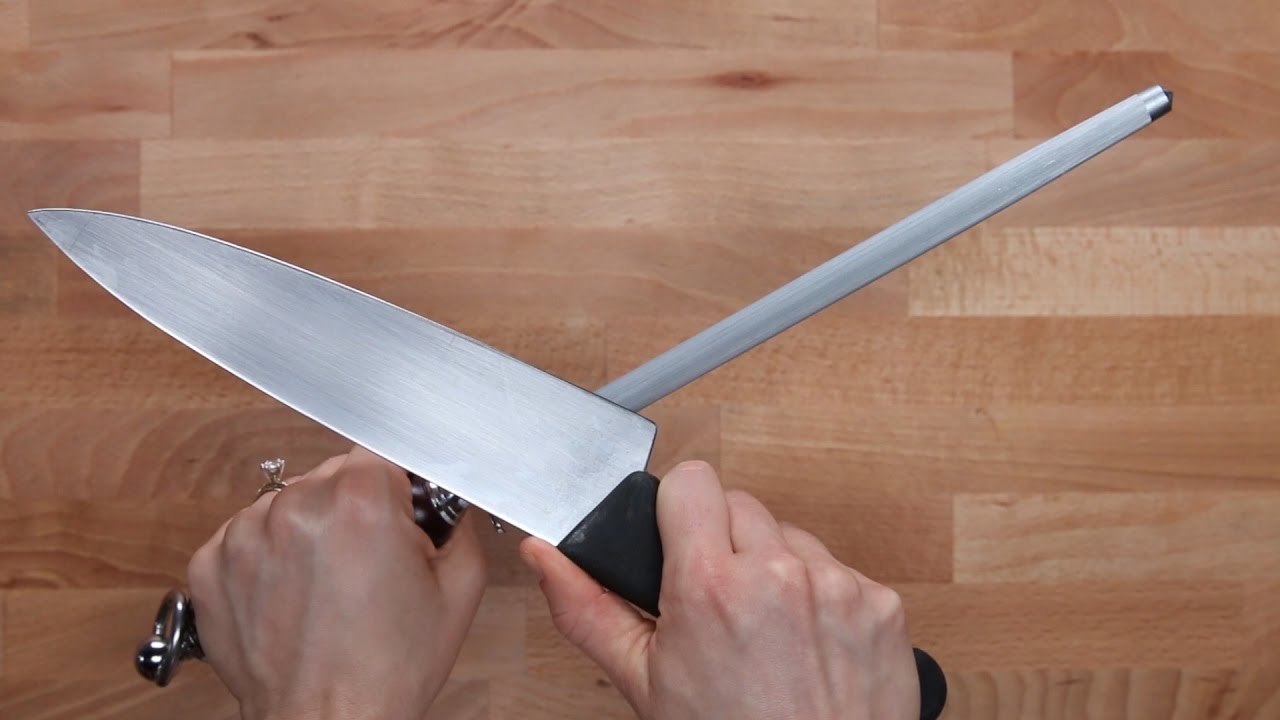
Image Source: i.ytimg.com
Why Your Kitchen Knives Need Sharpening
Knives get dull from regular use. Cutting on hard surfaces wears down the edge. Even good knives become less effective over time. Sharpening removes a little bit of metal. This creates a new, keen edge.
The Difference Between Sharpening and Honing
People often mix up sharpening and honing. They are not the same thing. This is vital for maintaining knife edge health.
Honing Rod Versus Sharpening Stone
A honing rod vs sharpening stone comparison helps clarify this.
- Honing Rod (Steel): A honing rod realigns a slightly bent edge. It does not remove metal. Think of it as straightening a bent piece of wire. You should hone often, perhaps before every use.
- Sharpening Stone (Whetstone): A sharpening stone actually removes metal. It forms a new edge geometry. You sharpen when honing no longer fixes the blade.
Using a honing rod regularly slows down how fast your knife gets dull. This means you sharpen less often.
Essential Tools for DIY Knife Sharpening
To start your DIY knife sharpening guide, you need the right gear. You do not need the most expensive items, but quality matters.
Selecting the Best Whetstones for Knives
Whetstones, or water stones, are the gold standard for many cooks. They give great control over the final edge. Choosing the best whetstones for knives depends on your knife’s current state.
Whetstones come in different grit levels. Grit measures how coarse or fine the stone is. Low numbers mean coarse stones. High numbers mean fine stones.
| Grit Range | Purpose | Typical Use |
|---|---|---|
| Coarse (120 – 800) | Repairing chips, setting a new bevel | Very dull or damaged knives |
| Medium (1000 – 3000) | General sharpening, creating a working edge | Most common sharpening needs |
| Fine (4000 – 8000+) | Polishing the edge, refining the sharpness | Finishing a polished, razor-sharp edge |
Water Stones vs Oil Stones
Another choice is water stones vs oil stones.
- Water Stones: These require soaking in water before use. They cut fast and produce a fine edge. They clean up easily. They are popular today.
- Oil Stones: These need oil applied during sharpening. They cut slower but are very durable. Cleanup can be messier as the oil mixes with metal dust.
Most home cooks prefer water stones for ease of use and speed.
Other Needed Items
- A stable base or holder for the stone.
- Water or oil (depending on your stone type).
- A clean rag or towel.
- A marker (for checking your angle).
Step-by-Step Sharpening Process
Achieving a razor sharp edge takes patience and practice. Follow these steps carefully.
Step 1: Prepare Your Whetstone
If you use water stones, soak them in water until air bubbles stop coming out. This usually takes 5 to 10 minutes. The stone must stay wet while you work. If you use an oil stone, apply a thin coat of honing oil.
Step 2: Determine the Correct Sharpening Angles
The angle you use is crucial. Different knives need different angles for optimal performance. Getting this right is part of mastering sharpening angles for different knives.
- Western/German Knives (Chef’s Knives): These are often harder and hold an edge longer. They usually use a wider angle, around 18 to 22 degrees per side. This makes the edge more durable.
- Japanese Knives (Santoku, Gyuto): These knives use harder steel. They perform best with a narrower angle, often 10 to 15 degrees per side. This gives them superior sharpness but makes them slightly more delicate.
How to Find the Angle:
Hold the knife against the stone. A 90-degree angle is straight up and down. Halving that gives you 45 degrees. Halving that gives you about 22.5 degrees. You need to go a little lower than 22.5 degrees for a standard Western knife.
Use a black marker to draw a thin line along the edge bevel. As you sharpen, the marker ink will disappear. If the ink disappears evenly across the bevel, you have the right angle. If only the very tip of the edge goes clean, your angle is too high.
Step 3: Sharpening on the Coarse Grit (If Needed)
If your knife has nicks or is extremely dull, start with your coarse stone (around 400 or 600 grit).
- Place the stone on a stable base. Keep it wet.
- Place the heel of the knife blade flat on the stone at your chosen angle.
- Apply light, consistent pressure. Too much pressure slows you down and can damage the stone.
- Push the blade away from you across the stone, using smooth, even strokes. Move from the heel to the tip of the knife. Treat the entire length of the edge equally.
- Count your strokes (e.g., 10 strokes on one side).
- Flip the knife over. Use the same angle and pressure. Match the stroke count.
You are done with this stone when you feel a small burr form. A burr is a tiny, thin wire of metal that rolls over to the opposite side of the edge. You can feel it gently by running your fingertip away from the edge on the side you haven’t sharpened yet.
Step 4: Moving to the Medium Grit
Switch to your medium stone (1000 or 2000 grit). This refines the edge left by the coarse stone.
- Repeat the same motion as Step 3.
- Use slightly lighter pressure than before.
- Work until the burr moves to the other side, or until the edge feels significantly smoother.
- Alternate sides more often here. Do 5 strokes on one side, then 5 on the other. This helps keep the edge centered.
Step 5: Polishing with the Fine Grit
Switch to your fine stone (4000 grit or higher). This step refines the scratch patterns and polishes the edge.
- Use very light pressure. The goal is polishing, not heavy material removal.
- Continue alternating sides, perhaps doing 10 or 20 light strokes per side.
Step 6: Removing the Burr (Stropping)
After sharpening, the burr must be removed. If you skip this, your knife will feel dull instantly. This process is often called stropping.
- Use your finest stone, or a leather strop, lubricated with honing compound if you have one.
- Flip the knife over. Do a single, very light stroke, pulling the blade back towards you (opposite the sharpening direction).
- Alternate sides, using less and less pressure with each stroke. Do 5 light pulls on the right, 5 on the left. Reduce to 3, then 1.
- Finish with one final, almost weightless stroke on each side.
Alternative Sharpening Methods
While whetstones offer the best results, other tools are available, especially for beginners or those needing quick fixes.
Electric Knife Sharpener Reviews
An electric knife sharpener reviews often show mixed results. These tools are fast and easy. They use motorized abrasive wheels.
- Pros: Very fast. Good for beginners who struggle with angles.
- Cons: They remove a lot of metal quickly. They usually have fixed angles, which might not suit all your knives. Cheaper models can easily ruin a good blade by overheating or grinding too aggressively.
If you buy an electric sharpener, invest in a reputable brand known for quality motors and multiple stages (coarse, medium, fine).
Guided Sharpening Systems
These systems use clamps to hold the knife at a precise, fixed angle. You drag the sharpening stone along a guide rod.
- Pros: Guarantees a consistent angle every single time. Excellent for learning the feel of sharpening without worrying about hand angle.
- Cons: Can be slow. Setting up the clamp takes time. They are often best for straight edges and might struggle with very curved blades.
Testing Your Edge Sharpness
How do you know if you succeeded in achieving a razor sharp edge? There are safe and effective ways to test.
The Paper Test
This is the classic test. Hold a sheet of standard printer paper vertically by the corner. Try to slice down through it without sawing.
- Dull Knife: The knife will snag, tear, or fold the paper.
- Sharp Knife: The knife should slice cleanly through the paper with almost no resistance.
The Tomato Test
A truly sharp knife should slice a ripe tomato skin without crushing the soft flesh beneath. Push the edge lightly onto the skin; the blade should bite in immediately.
Maintenance: Keeping the Edge Sharp Between Sharpening Sessions
The best sharpening job will not last if you neglect basic care. Frequent maintenance is key to long-lasting sharpness.
Honing is Your Best Friend
Remember the honing rod vs sharpening stone difference? Use the rod often. If you use a knife daily, hone it daily, or at least every few uses. This simple act restores the edge alignment and delays the need for metal removal.
Proper Storage
How you store your knives affects their edges.
- Magnetic Strips: Great, as the blade never touches other metal.
- In-Drawer Organizers: Good, provided the slots are smooth and do not allow blades to bang together.
- Avoid Knife Blocks with Slots: These often cause the edge to dull as you pull the knife in and out against the wood.
Cutting Surfaces Matter
Always use cutting boards made of wood or plastic. Never cut on glass, granite, ceramic plates, or stainless steel counters. These hard surfaces instantly dull a sharp edge.
When to Seek Professional Knife Sharpening Services
Sometimes, you should call in the experts. If you have very expensive, specialized, or antique knives, you might prefer professional knife sharpening services.
Reasons to Use a Pro:
- Damaged Blades: If your knife has large chips or is severely bent, a professional has the machinery to repair the edge quickly and safely.
- Very Hard Steels: Some modern super-steels are difficult to handle with entry-level whetstones.
- Time Constraints: If you cook constantly and lack the time to master the technique, a pro saves you time.
- Specific Angles: Professionals can reliably hit very acute angles (like 10 degrees) required by some Japanese blades, which is hard to replicate by hand initially.
Advanced Sharpening Concepts
Once you master the basics, you can refine your knife sharpening techniques further.
Apexing and Micro-Bevels
After sharpening on your main stones (up to 3000 grit), you might introduce a micro-bevel.
A micro-bevel is a very small, slightly steeper angle applied only to the very tip of the edge. For example, if you sharpened your chef’s knife at 20 degrees, you might use a very fine stone at 22 degrees for just a few alternating strokes. This creates a stronger, apex that lasts longer while still retaining the thinness of the main edge.
Stropping Compound
A leather strop loaded with a fine abrasive compound (often green chromium oxide) is the final step after your finest stone. This compound polishes away any remaining microscopic imperfections left by the stone, pushing your knife past merely “sharp” into true razor territory.
Deciphering Sharpening Angles for Different Knives (Revisited)
Precision in angle is everything. Let’s look closer at common kitchen knives.
| Knife Type | Typical Edge Angle (Per Side) | Total Included Angle | Steel Type Implication |
|---|---|---|---|
| Western Chef’s Knife | 18° – 20° | 36° – 40° | Medium Carbon/Stainless |
| Japanese Santoku/Gyuto | 12° – 15° | 24° – 30° | High Carbon/Hard Steel |
| Paring Knife | 15° – 17° | 30° – 34° | Precision work needs a defined, durable edge |
| Serrated Knife | N/A (Must sharpen individual scallops) | Varies | Requires specialized tools or professional service |
If you use a DIY knife sharpening guide, remember that softer steel can handle a wider angle (20+ degrees) because it dulls faster and benefits from a more robust edge. Harder steel (like many premium Japanese brands) can handle thinner angles (under 15 degrees) because it resists rolling but might chip if the angle is too acute.
Frequently Asked Questions (FAQ)
How often should I sharpen my kitchen knives?
This depends heavily on usage. If you use your knives heavily every day, you might need a full sharpening session every 1-3 months. However, regular honing (daily or weekly) can extend this time significantly. If honing no longer makes the knife feel sharp, it’s time to sharpen.
Can I use sandpaper to sharpen a knife?
While technically possible (sandpaper can be glued to a flat surface to act as a coarse stone), it is generally not recommended for high-quality kitchen knives. Sandpaper grit is inconsistent. It removes metal unevenly and often leaves a rough, weak edge that dulls very quickly. Stick to dedicated whetstones for knives.
My knife is getting shorter. Am I using too much pressure?
Yes, excessive pressure causes you to remove more metal than necessary during the sharpening process. Light, consistent pressure is key. Let the grit of the stone do the work. High pressure also makes it harder to maintain a consistent sharpening angle.
What is the best grit to finish on?
For most home cooks, finishing on an 8000 grit stone provides an excellent, functional, and long-lasting edge. If you want true shaving-level sharpness, move up to 10,000 or 12,000 grit, followed by a good leather strop.
Do I need to sharpen both sides of the knife equally?
Yes, absolutely. Uneven sharpening leads to an inconsistent edge that favors one side, causing it to roll or feel dull quickly on the other. Alternating strokes helps ensure both sides meet precisely at the apex.